Appearance
Using Xvid AutoGraph in a Magento Shop
Setup and Installation
If you currently run your site based on a Magento 2 based shop, it is rather easy to integrate it with Xvid MediaHub. By installing the Xvid MediaHub Magento plugin, you can:
- Sell Xvid MediaHub hosted videos as downloadable products and offload the product downloads to the fast Xvid MediaHub CDN.
- Protect videos that you sell with Xvid AutoGraph forensic watermarking (you'll be able to track each illegal copy of videos you sold back to the Magento Customer ID of the user who pirated the content).
So let's start with setting up the necessary pieces...
Step 1: Install the Xvid MediaHub Plugin in Your Magento Shop
- Download the module archive from here: xvidmediahub-magento.tar.gz
- Copy the
xvidmediahub-magento.tar.gzarchive into your Magento'sapp/code/folder and extract the archive there. - Enable the new module by typing the following commands:
bash
sudo bin/magento-cli module:enable XvidServices_MediaHubDownloadable
sudo bin/magento-cli setup:upgrade
sudo bin/magento-cli setup:di:compile
Step 2: Create an Application to Use with Your Site in Your Xvid MediaHub Account
TIP
If you have created an application already as part of some other tutorial, you can skip this step.
An application sets up a set of alternative "login" credentials, allowing you to delegate API access under your account to one (or more) applications (e.g. a script, your website, etc.). This way you don't need to leak your actual username and password into an application config file, and you can also at any time disable API access of a certain application or re-create the entire application with new credentials in case an app got compromised or insecure — without harming your overall account or any other app in your account.
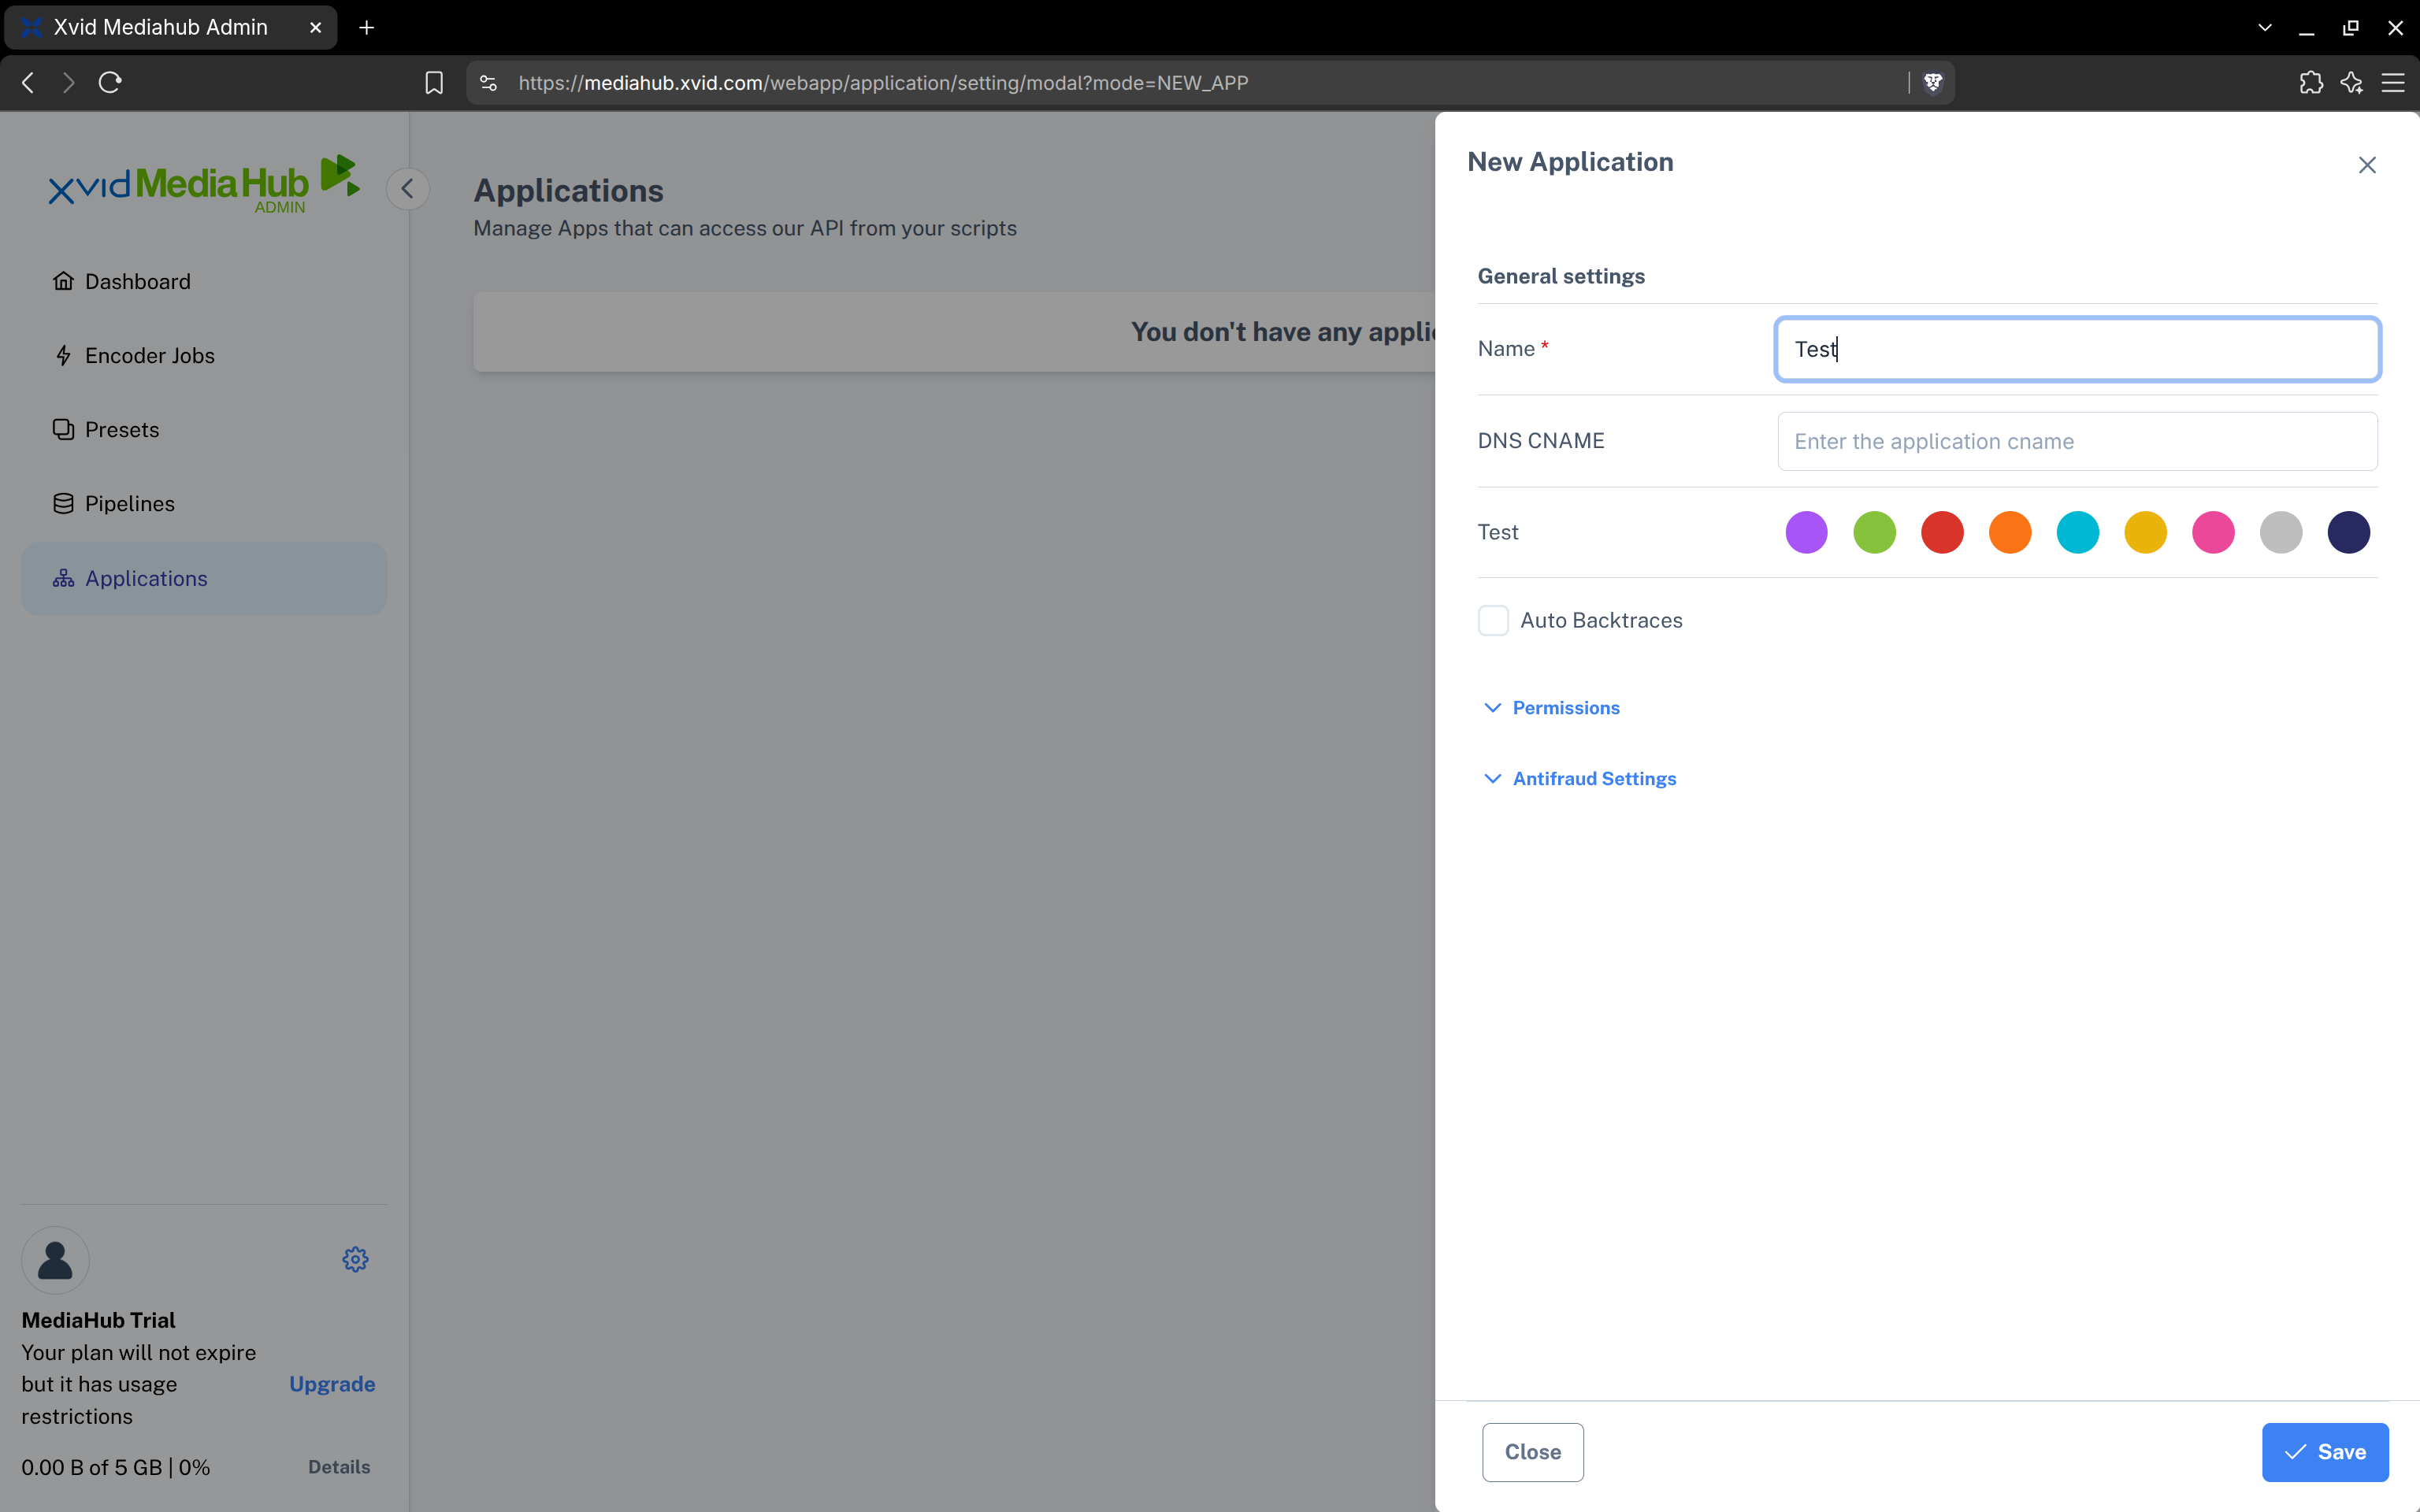
So let's switch to the "Applications" page and click "Add new Application", then enter a name for your new app and click "Save":
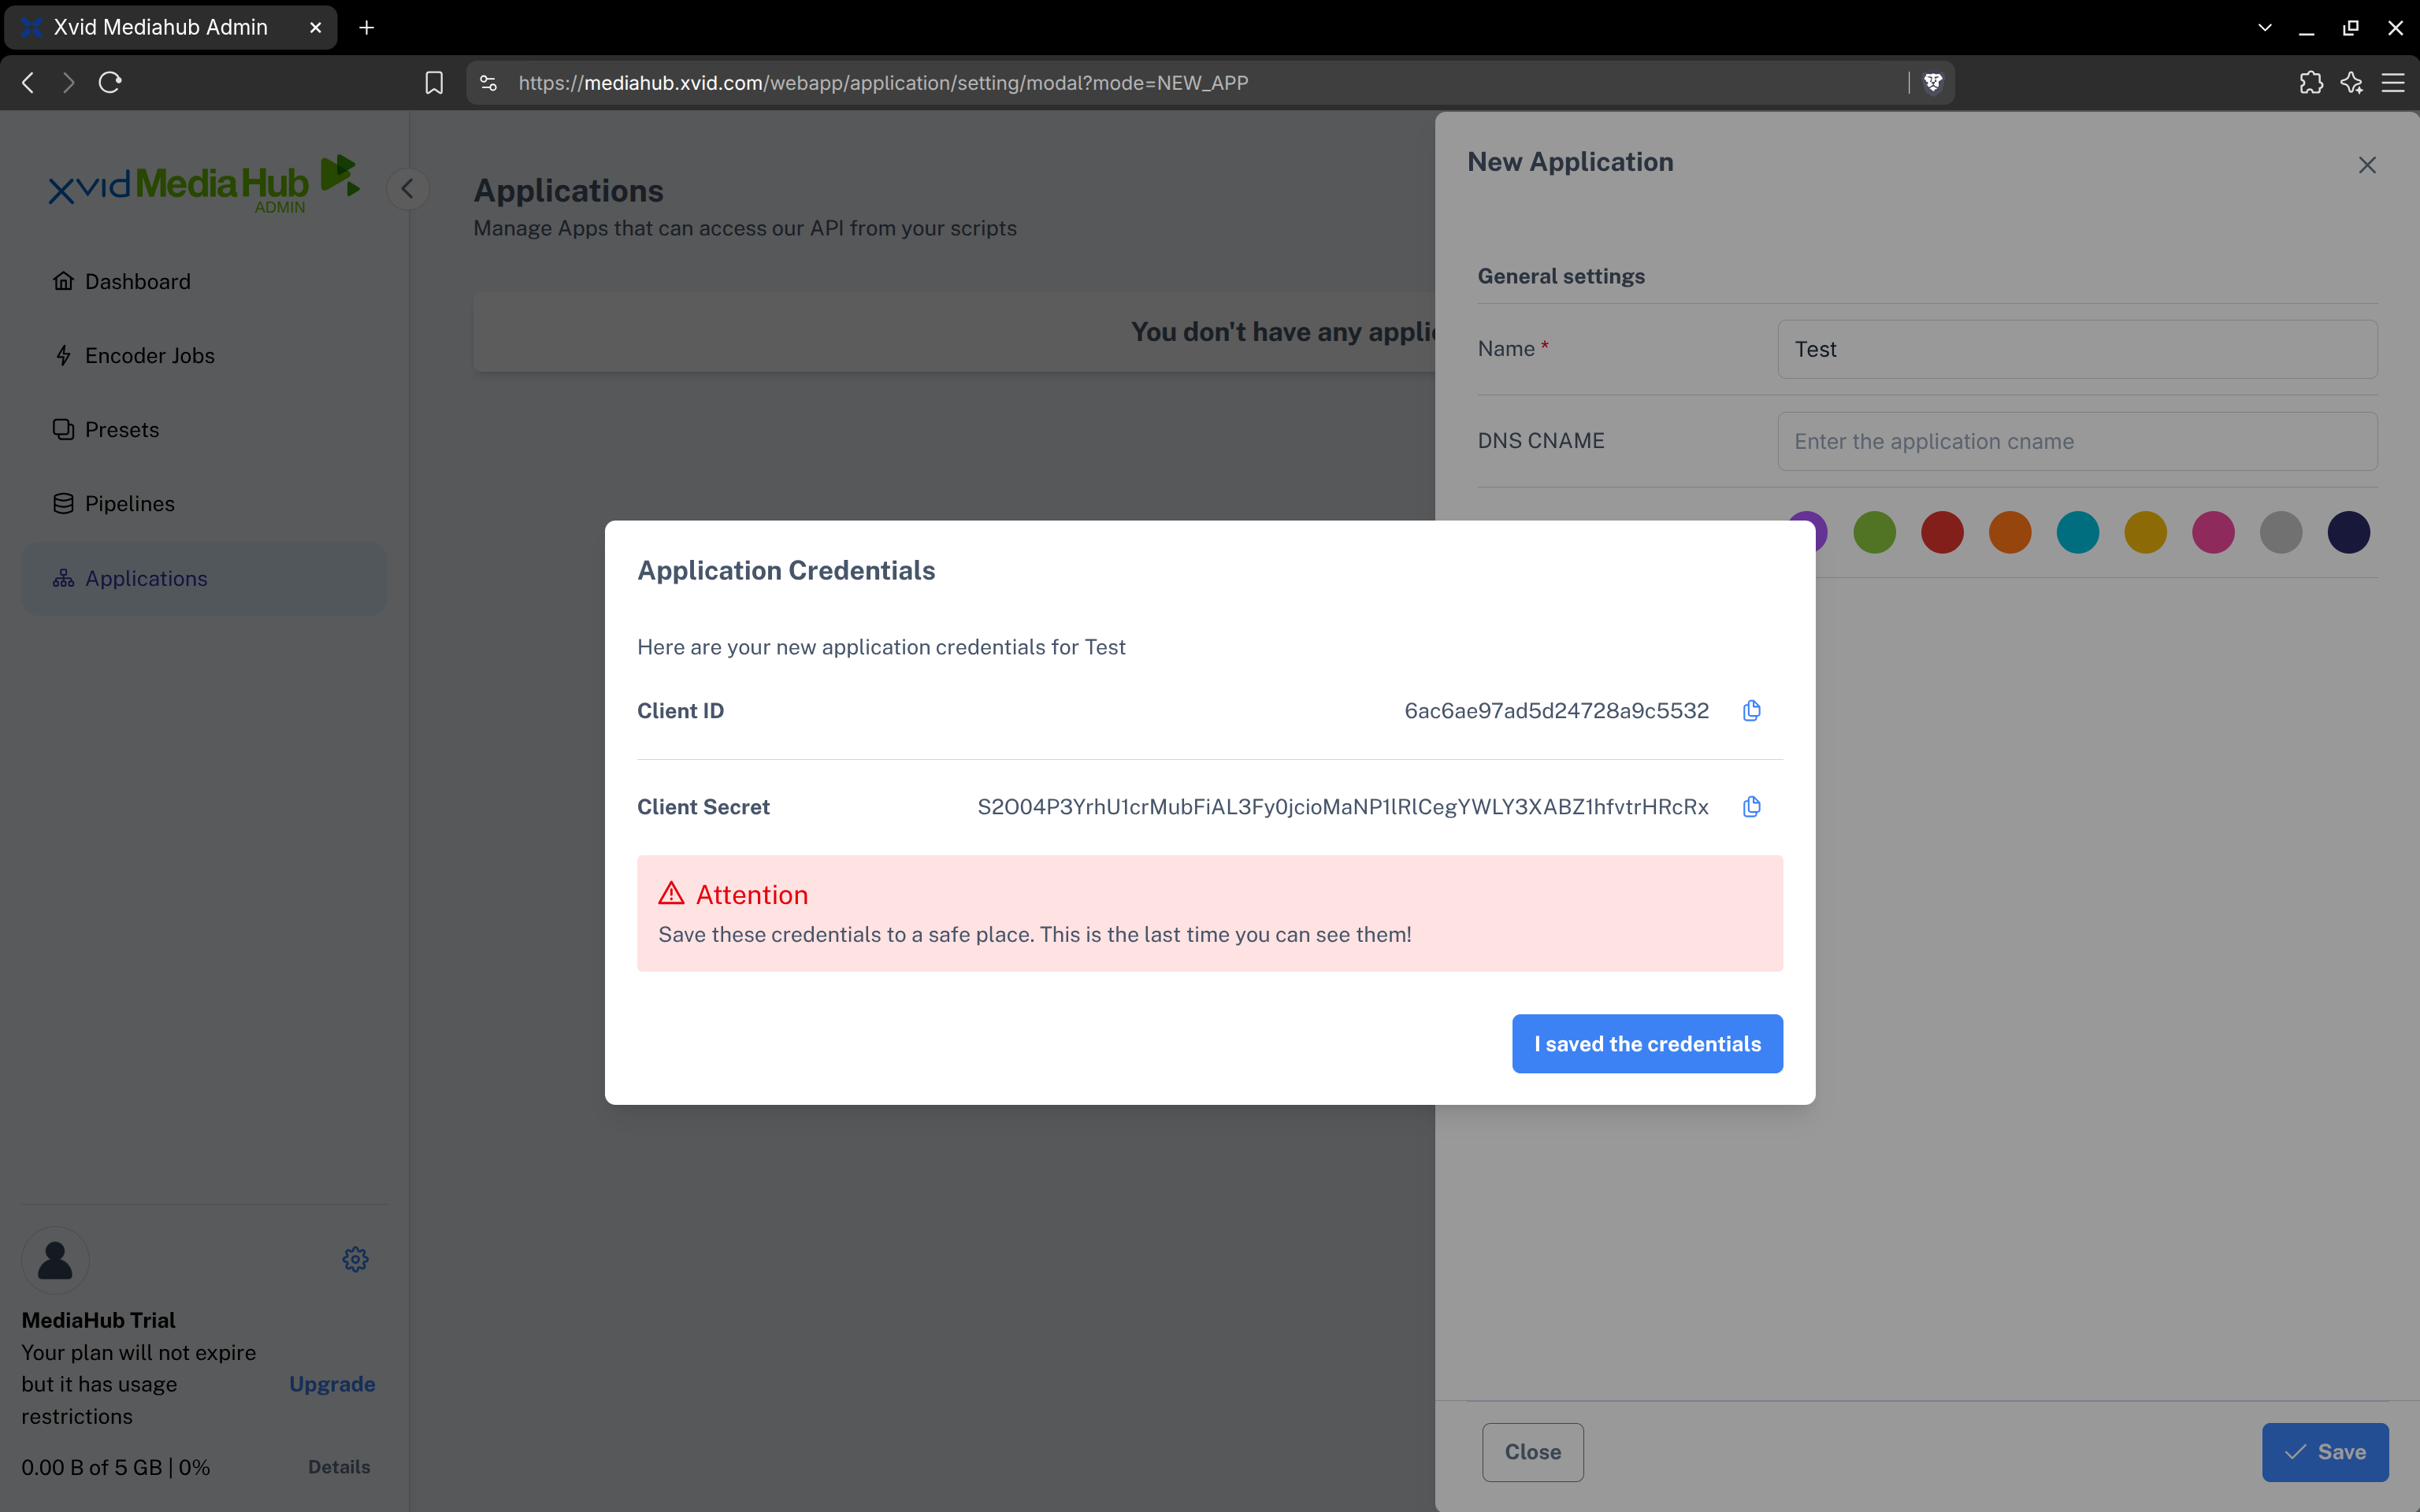
You will then see a popup displaying the credentials corresponding to your newly created application. Click on the "Copy" icon to copy & paste your Client ID and Client Secret. We'll need them in the next step:
Step 3: Configure Your New Xvid MediaHub Magento Plugin
- Log into the Magento admin backend with a user having admin privileges.
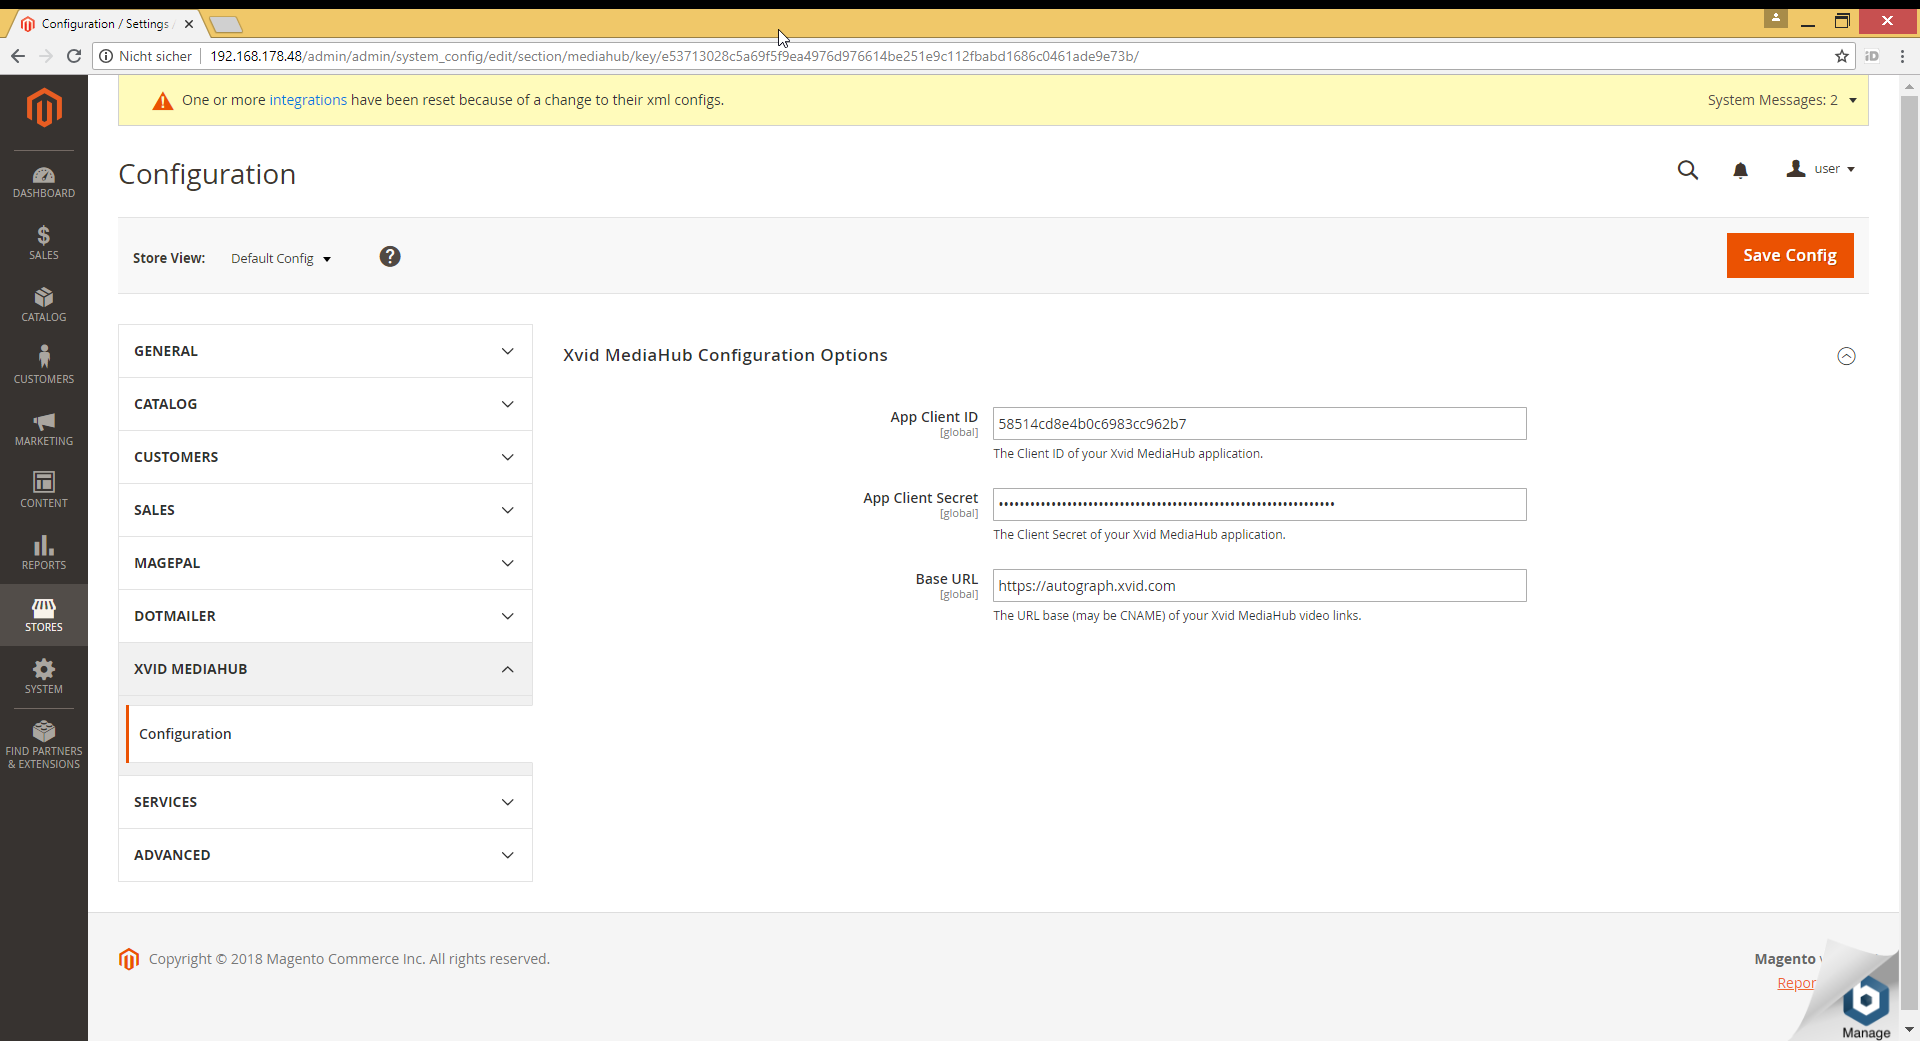
- Click on "Stores" -> "Configuration", then select "XVID MEDIAHUB" -> "Configuration" from the side menu.
- Copy & paste your application's Client ID and Client Secret into the respective fields in the configuration dialog.
- If you want your users to also stream purchased videos directly in the browser (in addition to just downloading them), you need to create a new custom product attribute "video_player" with possible values Yes/No. Then, for all products where you set the "video_player" attribute to "Yes", a video player will also be shown in addition to the downloadable product links so that users can also watch the videos directly in the browser.
Step 4: Add a MediaHub Hosted Video to a Downloadable Product
- Go to "Catalog" -> "Products" to either edit or add a new downloadable product (click "Add Product" -> "Downloadable Product").
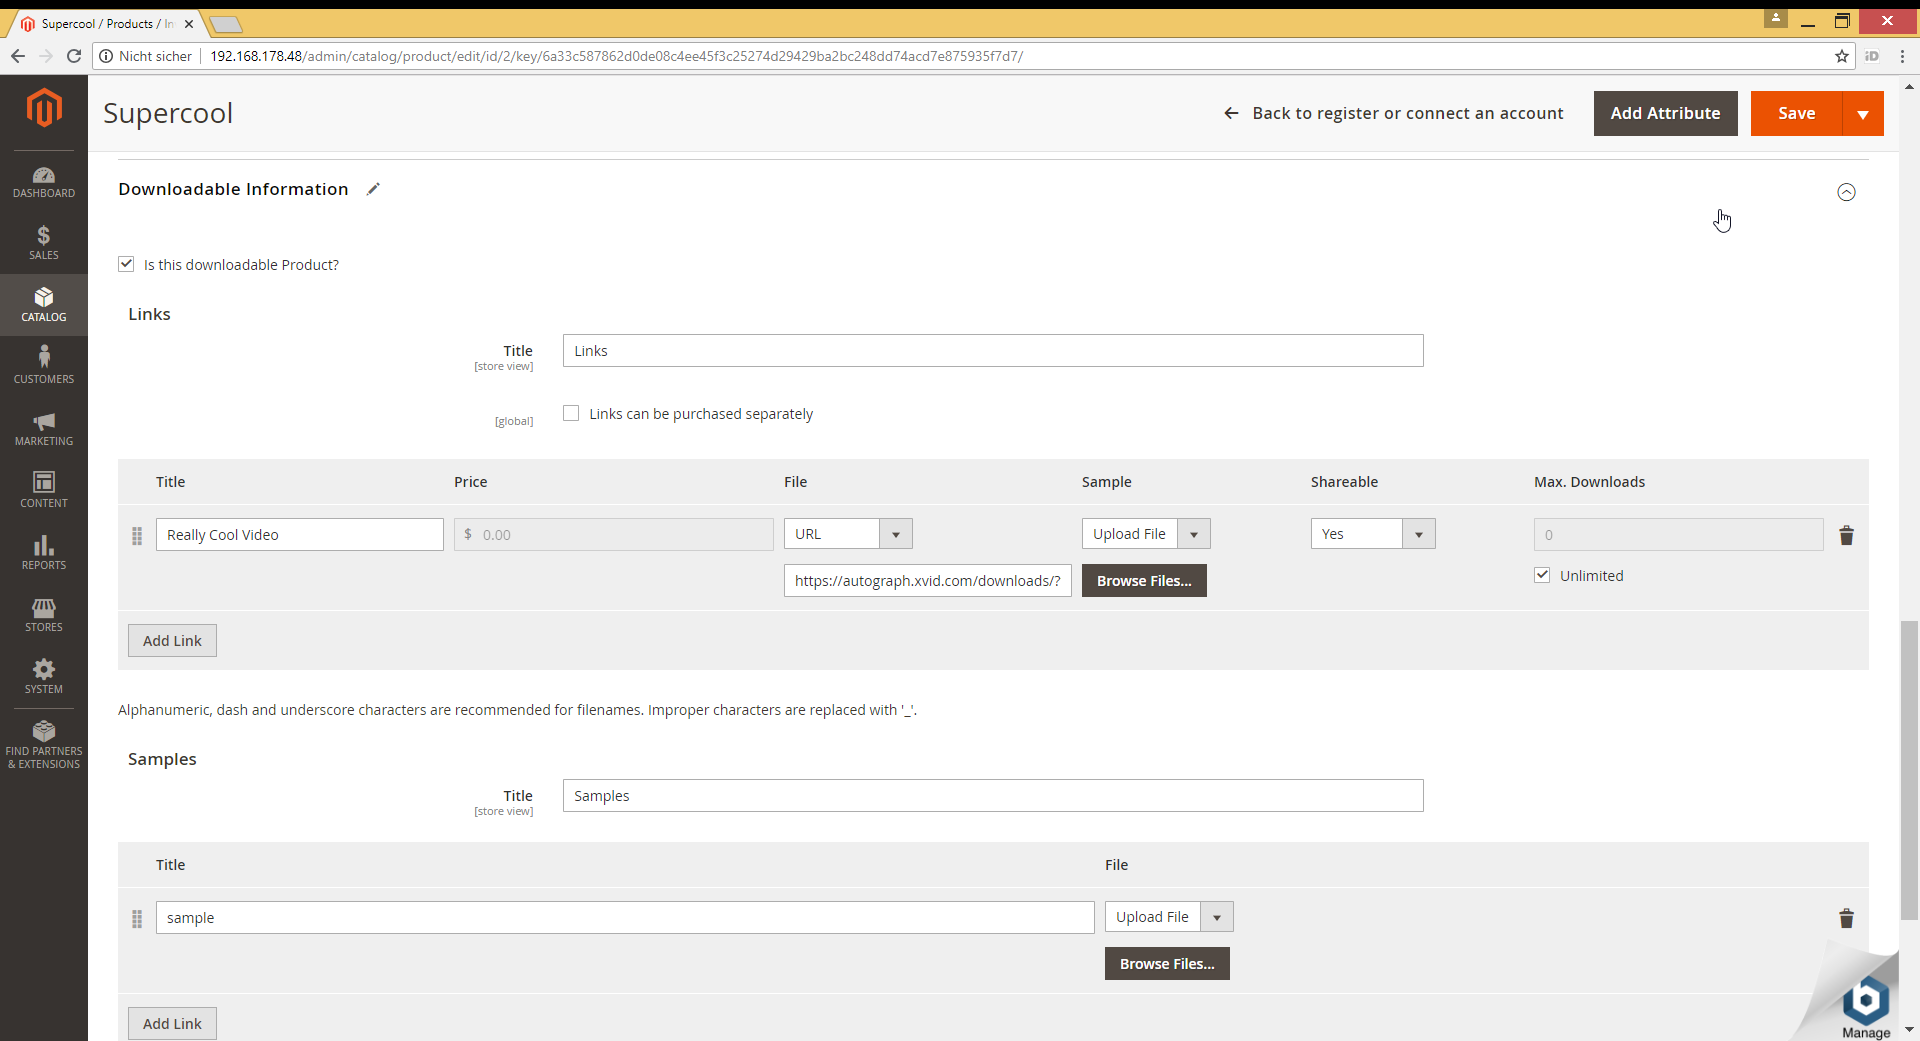
- In the "Links" section, add a link for each video that you want to sell as part of this product. In the "File" dropdown, select URL and enter a download link to a Xvid MediaHub hosted video file id like this:
text
https://autograph.xvid.com/downloads/?file_id=5a9fb76be228cd2b48aa1424The file id above serves just as an example. Make sure you put the file id of your own video that you want to sell. You can look up the file ids for all of your Xvid MediaHub hosted videos in your Xvid MediaHub dashboard (in the "Info" tab, click on "Details" next to a completed conversion job — an overlay dialog will pop up that shows the file ids of each output video belonging to this job, and you can copy the file id to the clipboard).
WARNING
ATTENTION: Make sure that your links are not shareable so that users always need to log in to download. So set the "Shareable" option of the links to "No" (or "Use Config" if your config default is "No").
Step 5: Video Streaming (Optional)
If you want to allow your users to not only download your videos but also directly watch them on your site, make sure that you set the Xvid Video Player ("video_player") attribute to "Yes" for your product:
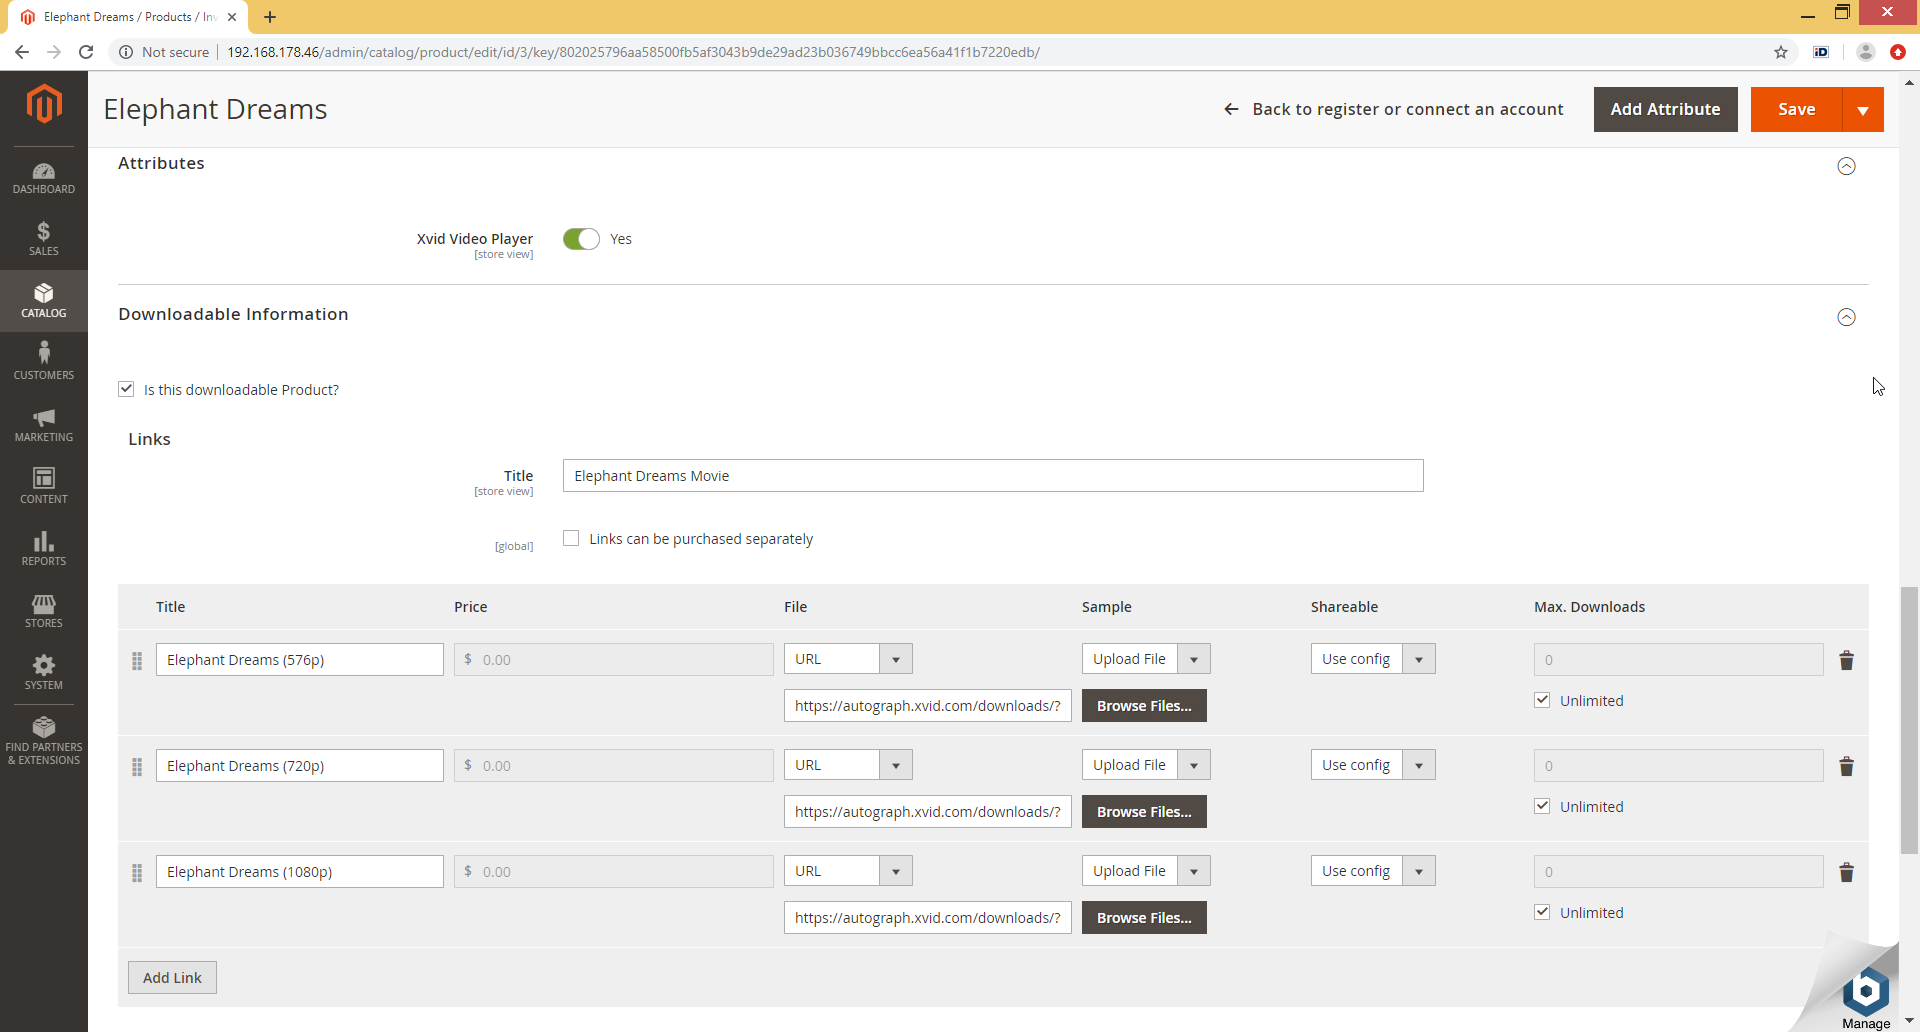
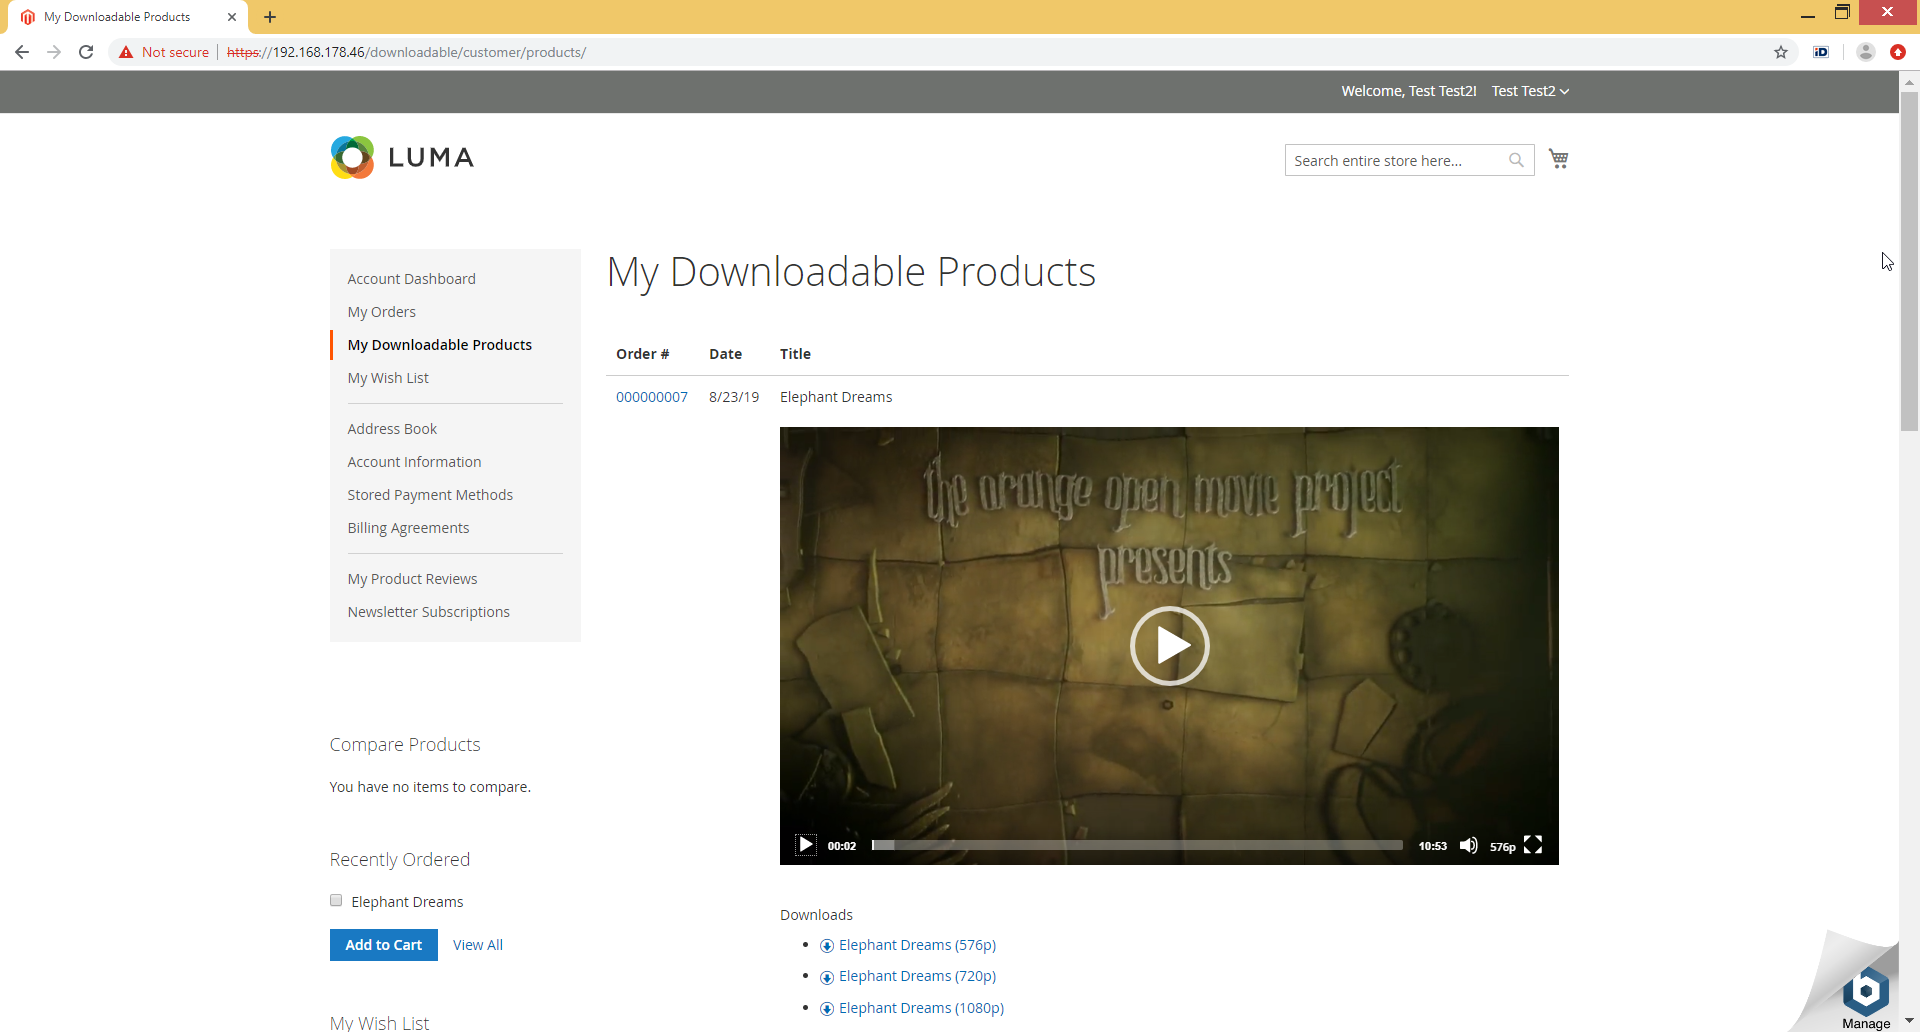
If the video player is enabled, the "My Downloadable Products" page will also show one video player per product in addition to the downloads.
If you have multiple download links for the product, it is assumed that these are different quality levels / resolutions, and all of the available links are used in the one video player to offer the user a video quality selector. If you want to sell multiple different videos in one product, set up one product per video title and then a grouped or bundled product to offer the different videos as one item to your users.
If you have multiple video links per product to support different video qualities, it is assumed that the quality level or resolution is indicated at the end of the link title. So the video player strips out the last word from the link title and shows it in the quality selector. Therefore, good link titles are for example: "My video - 720p", "My video (HD)" or "My video - 20Mbps".
If everything is set up correctly, users who purchased a product with the "video_player" attribute set should see a video player streaming the purchased content in their "My downloadable products" account page like below: