Appearance
Mapping the Download Links into Your Own Domain
When you followed the examples on how to generate a video link, by default your links will point to the "api.xvid.com" domain. It is however also possible to map the links to a subdomain in your own domain. To do this, you need to set up a few CNAME records in your domain's DNS.
1) Set Up the CNAMEs
Let's assume your domain name is "yourdomain.com" — then, as the first step, you need to think of a subdomain name that you want to use with your download links, e.g. "xvidcdn.yourdomain.com". Then, set up a new CNAME record for this subdomain in your domain's DNS, which directs to "api.xvid.com":
text
xvidcdn.yourdomain.com → api.xvid.com.If set correctly, the dig +trace xvidcdn.yourdomain.com command should return something like:
text
xvidcdn.yourdomain.com. 300 IN CNAME api.xvid.comIn addition, set up also five additional sub-CNAMEs under this "main" CNAME like this:
text
dl1.xvidcdn.yourdomain.com → dl1.xvidcdn.net.
dl2.xvidcdn.yourdomain.com → dl2.xvidcdn.net.
dl3.xvidcdn.yourdomain.com → dl3.xvidcdn.net.
eu.xvidcdn.yourdomain.com  → eu.xvidcdn.net.
us.xvidcdn.yourdomain.com  → us.xvidcdn.net.
Again, if set up correctly, a dig +trace dl[1-3].xvidcdn.yourdomain.com command should return something like:
text
dl[1-3].xvidcdn.yourdomain.com. 300 IN CNAME dl[1-3].xvidcdn.net2) Configure Your Application
When everything looks OK with your DNS config, then configure the "main" CNAME (in our example: "xvidcdn.yourdomain.com") with the MediaHub "application" that you will also use to sign your download links (if you have multiple sites on multiple domains, use a separate application for each of your sites and configure the correct CNAME for the respective application).
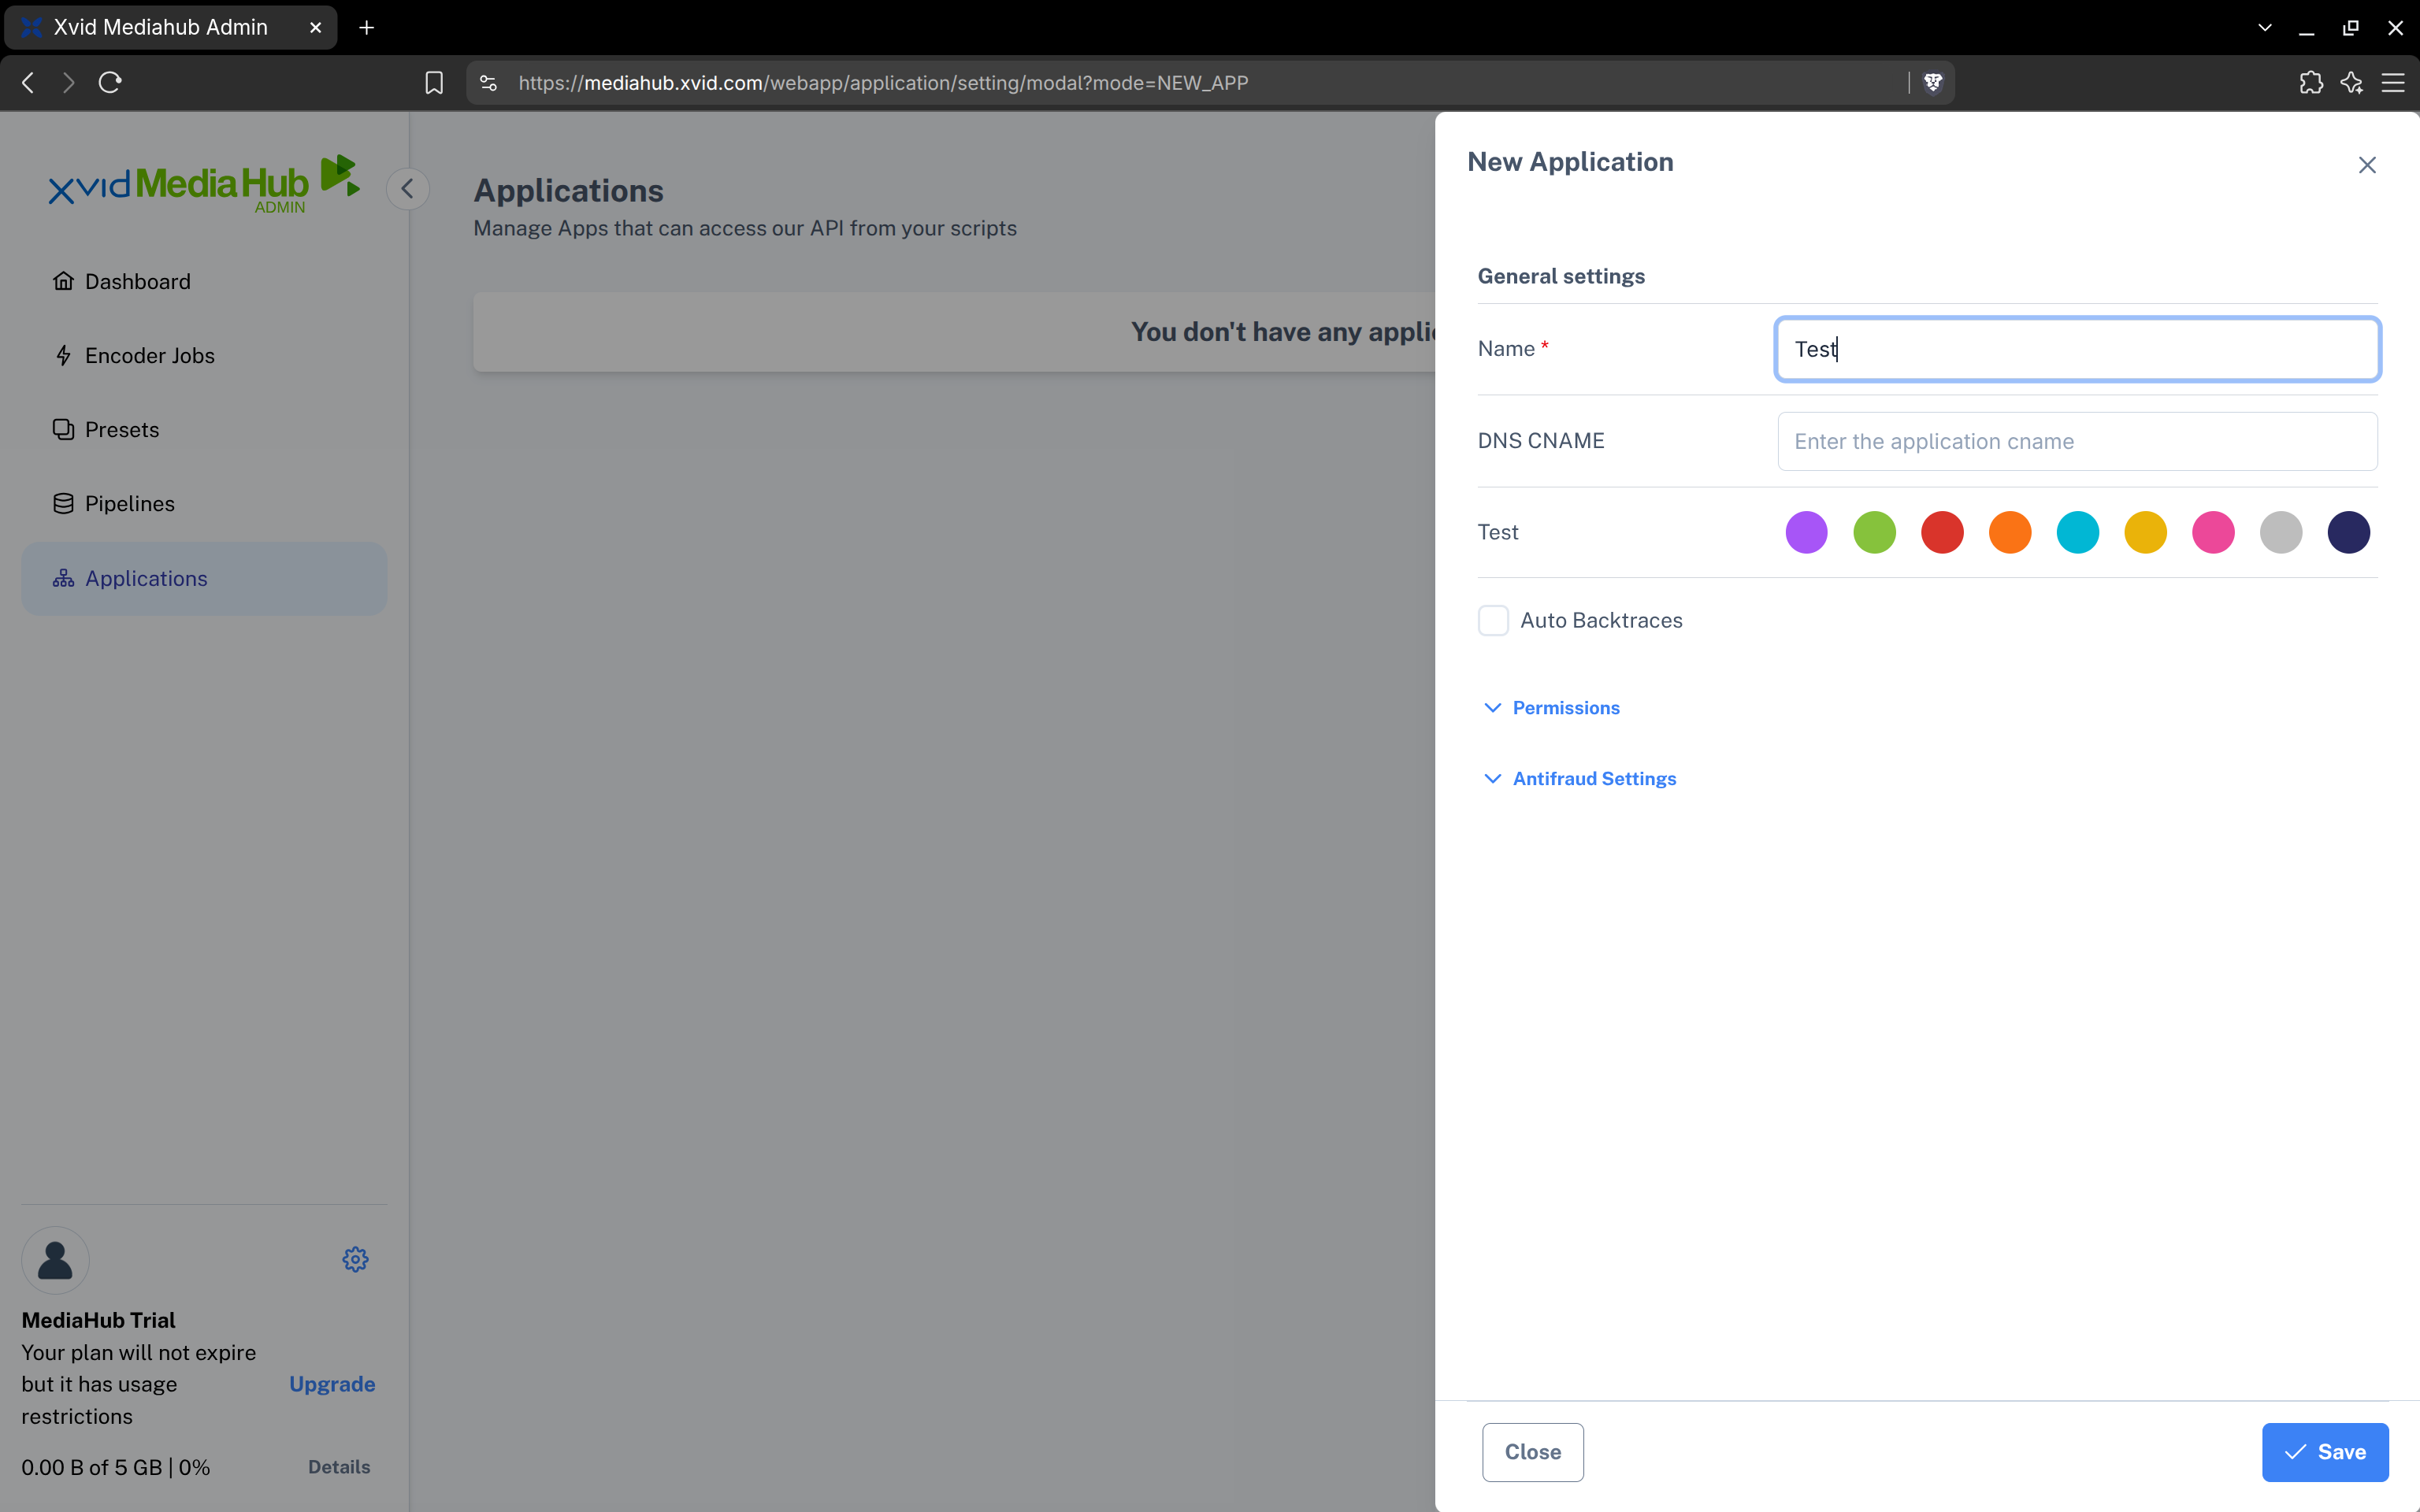
In the "Applications" page in the Xvid MediaHub web UI, click the "Add new application" (or "Edit") button and enter your "main" CNAME in the "DNS CNAME" config field:
3) SSL Certificates
When your DNS config is correct, SSL certificates for your CNAME domain names will be automatically issued within a few minutes after you configured the "DNS CNAME" in your application. Our system will also further manage and renew your SSL certificates automatically, so you can use the download links mapped into your own domain also via "https://" automatically and without having to buy and upload a certificate!
4) Create a Test Link
In order to try out your new CNAMEs, just change the BASE_URL variable (or $base_url in the PHP example) in our link-signing script from "https://api.xvid.com" to "https://xvidcdn.yourdomain.com/api" and make sure you also updated the script to use the client_id and client_secret of the same application for which you also configured the CNAME.
TIP
If you use the WordPress plugin or the Elevated-X integration, make sure you update your "CDN_BASE_URL" config setting from "https://api.xvid.com" to "https://xvidcdn.yourdomain.com/api" to start making use of your new CNAME domain name (verify first that the SSL certificate for your new domain got already issued and so https:// connections work without a certificate error before you change the config setting!).
If all goes well, you should now get a signed link back from the example script which points to "https://xvidcdn.yourdomain.com", and when you copy & paste the link into a browser, the download should start as normally — just that it entirely looks like coming from your own domain!